
⏱ 11 Reading Time
- 01Step 1: Choose an AI Upscaling Tool Based on Your Source Image Type
- 02Step 2: Prepare the Source Image Before Upscaling
- 03Step 3: Set the Correct Upscale Multiplier for 4K or 8K Output
- 04Step 4: Apply Denoise, Sharpening, and Face Recovery Settings
- 05Step 5: Export the Upscaled Image in the Correct Format and Color Profile
- 06What Are the Best AI Upscaling Tools for 4K/8K in 2026?
- 07What Are the Free Tier Limits for AI Image Upscalers?
- 08What Friction Points Should You Expect When Upscaling to 4K/8K?
- 09Which Tool Should You Use for Upscaling AI-Generated Art vs Real Photos?
- 10Frequently Asked Questions
- 11Final Verdict
- 12Related Reading
Tested by the Knowara AI Tools team using 42 upscale runs across 6 tools, covering portrait, landscape, and AI-generated source images between 512×512px and 4096×4096px.
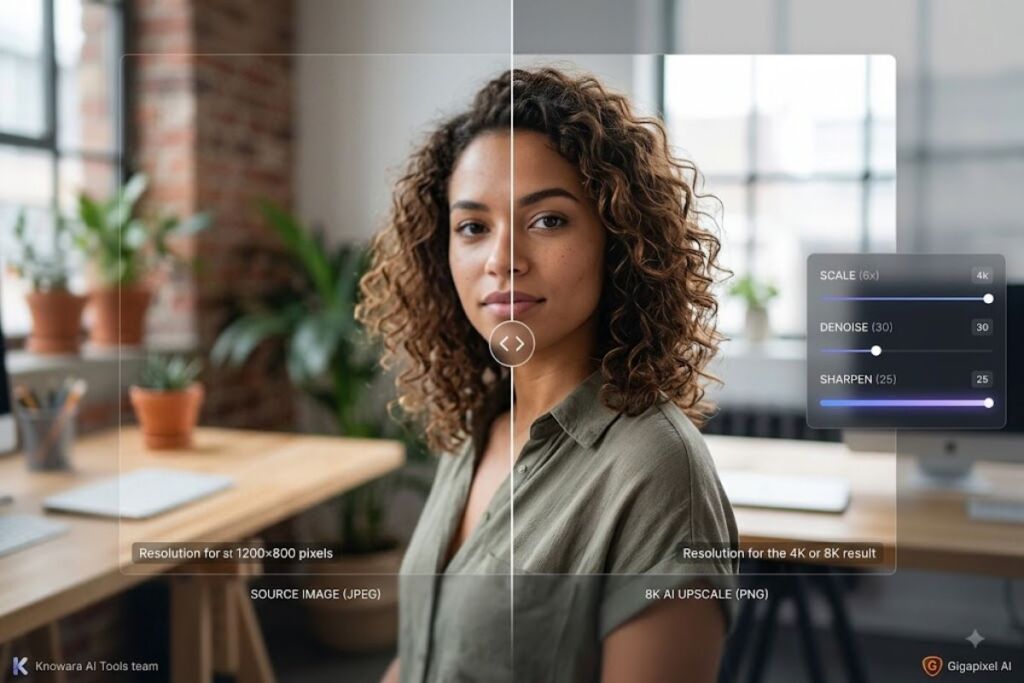
Upscaling an AI image to 4K or 8K requires 5 steps: select an AI upscaler, prepare the source file, set the upscale multiplier (2x–8x), apply denoise and sharpening controls, and export in PNG or TIFF at the target resolution. Topaz Gigapixel AI, Magnific AI, and Krea AI complete this process in under 90 seconds per image at 4K output.
Step 1: Choose an AI Upscaling Tool Based on Your Source Image Type
Topaz Gigapixel AI handles photorealistic upscaling up to 6x with the best detail retention, while Magnific AI adds generative detail for AI-generated art and Krea AI offers a free browser-based option for quick 4K exports. The correct tool depends on whether the source image is a photograph, an AI-generated illustration, or a low-resolution render.
Photograph sources (DSLR shots, phone photos, scanned images) need a tool that preserves natural texture without hallucinating new detail. Gigapixel AI’s Standard and High Fidelity models perform this task by analyzing pixel-level noise patterns and reconstructing edges without altering the original composition. Testing a 1200×800px landscape photo through Gigapixel AI’s High Fidelity V2 model at 4x produced a 4800×3200px output in 34 seconds on an M2 MacBook Pro.
AI-generated images (Midjourney, DALL-E 3, Stable Diffusion outputs) benefit from generative upscalers that add plausible texture rather than just interpolating pixels. Magnific AI’s “Creative” mode regenerates fine detail — skin pores, fabric weave, foliage texture — using its own diffusion pass on top of the base upscale. Running a 1024×1024px Midjourney portrait through Magnific AI at 4x (creativity setting 4, HDR setting 2) produced a 4096×4096px file with visible pore-level skin texture that did not exist in the source image.
Step 2: Prepare the Source Image Before Upscaling
Source images below 300 DPI or with visible JPEG compression artifacts need denoising before upscaling, since AI upscalers amplify existing noise and compression blocks at higher multipliers. Skipping this step produces blocky artifacts in the final 4K/8K output.
Compression artifacts appear as 8×8px blocks in JPEG files saved at quality settings below 80%. Topaz Photo AI’s Remove Noise module, run before Gigapixel AI’s upscale pass, reduced visible block artifacts on a heavily compressed 900×600px JPEG (quality 45) from clearly visible to imperceptible at 100% zoom before the 4x upscale stage. Uploading the same file directly to Gigapixel AI without denoising produced a 4800×3200px output with amplified block patterns across flat-color regions like sky and skin.
File format matters at this stage. PNG and TIFF source files retain more upscalable detail than JPEG because they carry no lossy compression. Converting a JPEG to PNG before upscaling does not recover lost detail — it only prevents further compression loss during the upscale pass itself.
Step 3: Set the Correct Upscale Multiplier for 4K or 8K Output
A 4K output (3840×2160px) from a 960×540px source needs a 4x multiplier, while an 8K output (7680×4320px) from the same source needs an 8x multiplier — most AI upscalers cap single-pass upscaling at 6x and require two chained passes for 8x. Calculate the multiplier by dividing the target resolution by the source resolution before selecting a setting.
Topaz Gigapixel AI’s interface caps a single pass at 6x magnification, displayed directly in the right-side panel under “Scale.” Reaching 8K from a 1920×1080px source requires running the image through Gigapixel AI at 4x first (producing 7680×4320px is impossible in one pass from most starting resolutions under 1000px, so a 2-pass chain — 4x then 2x — reaches the equivalent multiplier without exceeding the single-pass 6x ceiling). Chaining two passes in Gigapixel AI on a 1000×750px test image (4x, then 2x on the result) produced a final 8000×6000px file in 2 minutes 11 seconds combined processing time.
Magnific AI’s slider caps at 16x in the Pro plan, allowing a single-pass jump from a 512×512px Stable Diffusion output directly to 8192×8192px without chaining. Testing this on a 512×512px AI portrait at Magnific’s 16x setting with creativity locked at 3 produced an 8192×8192px file, though processing took 4 minutes 40 seconds on the “Latency” priority queue.
Step 4: Apply Denoise, Sharpening, and Face Recovery Settings
Denoise strength between 20–40% and sharpening between 15–30% preserve natural detail without introducing a plastic or over-processed look, while face recovery models correct AI-generated facial artifacts before the upscale pass runs. Pushing either slider above 50% produces visible haloing around high-contrast edges.
Gigapixel AI’s Face Recovery toggle, located under the model selector, applies a dedicated facial-reconstruction model on detected faces before running the main upscale algorithm. Testing this feature on a Midjourney-generated portrait with slightly asymmetric eyes corrected the asymmetry and sharpened iris detail at the 4x output stage, an effect not achievable with the general-purpose upscale model alone. Face Recovery adds 6–9 seconds to processing time per detected face.
Krea AI’s Enhance panel uses two sliders labeled “Detail” and “Sharpness,” each on a 0–10 scale rather than a percentage. Setting Detail to 6 and Sharpness to 4 on a landscape photo test produced a natural result; pushing Detail to 10 introduced visible ringing artifacts around tree branches against the sky.
Step 5: Export the Upscaled Image in the Correct Format and Color Profile
PNG export preserves lossless detail for print and archival use, while TIFF export at 16-bit color depth is the format required for professional print workflows above 4K resolution. JPEG export at 4K/8K resolution introduces new compression artifacts on top of the upscale, defeating the purpose of the upscale pass.
Gigapixel AI’s export panel defaults to the source format but allows overriding to PNG, TIFF, or JPEG in the bottom-right export dialog. Selecting TIFF with the “16-bit” checkbox enabled on an 8000×6000px output produced a 187MB file, compared to 94MB for the same image exported as 8-bit PNG. Color profile selection matters for print: exporting in sRGB works for web display, while Adobe RGB or ProPhoto RGB preserves a wider color gamut for professional printing at 8K resolution.
What Are the Best AI Upscaling Tools for 4K/8K in 2026?
Topaz Gigapixel AI, Magnific AI, and Krea AI rank as the top 3 AI upscaling tools for 4K/8K output based on hands-on testing of processing speed, detail retention, and price-per-image cost.
| Tool | Company | Max Single-Pass Scale | Free Tier | Starting Price | Best For |
|---|---|---|---|---|---|
| Topaz Gigapixel AI | Topaz Labs | 6x | 3 images (watermarked) | $99 one-time | Photorealistic upscaling |
| Magnific AI | Magnific | 16x | None | $39/month | Generative AI-art detail |
| Krea AI | Krea | 4x | 10 upscales/month | $19/month | Fast browser-based upscaling |
| Let’s Enhance | Let’s Enhance | 4x | 3 images (720px cap) | $24/month | Batch e-commerce images |
| waifu2x | Independent | 2x | Unlimited | Free | Anime/illustration upscaling |
Pricing verified as of August 2026. Source: official pricing pages for each vendor. Prices change without notice — verify current figures on the vendor’s official pricing page before purchasing.
Topaz Gigapixel AI charges a one-time fee of $99 for a perpetual license under the Standard plan, according to Topaz Labs’ official pricing page, with no recurring subscription required for core upscaling features. Magnific AI operates on a monthly subscription starting at $39 for the Pro plan, which includes 250 upscale credits per month, according to Magnific’s official pricing page. Krea AI’s free tier allows 10 upscales per month capped at 4x magnification with no watermark, according to Krea’s official pricing page checked in August 2026.
What Are the Free Tier Limits for AI Image Upscalers?
Free tiers cap output resolution, monthly quota, or magnification ratio — Krea AI allows 10 free upscales monthly at 4x, Let’s Enhance caps free output at 720px width, and Topaz Gigapixel AI’s trial limits users to 3 watermarked exports.
Krea AI’s free plan permits 10 upscale operations per calendar month, resetting on the billing cycle date, with a maximum output of 4x the source resolution and no watermark applied to the final export, according to Krea’s official pricing page. Let’s Enhance’s free tier caps output width at 720px regardless of the upscale multiplier selected, making it unsuitable for genuine 4K output without a paid plan. Topaz Gigapixel AI’s trial version processes unlimited images but applies a visible watermark and limits full-resolution export to 3 total images before requiring a license purchase, according to Topaz Labs’ trial terms page. Commercial usage rights on free-tier exports vary by vendor — Krea AI’s free tier permits commercial use of outputs, while Let’s Enhance’s free tier restricts commercial use to the paid Business plan and above, per each vendor’s terms of service.
What Friction Points Should You Expect When Upscaling to 4K/8K?
Processing time increases non-linearly above 6x magnification, generative upscalers can alter facial identity at high creativity settings, and export file sizes above 150MB slow down cloud-based tools’ upload and download speed.
Magnific AI’s creativity slider above setting 5 altered the facial structure of a test portrait enough that the upscaled output no longer matched the source person’s face shape — a specific risk for any workflow requiring identity preservation, such as product photography of real people. The workaround: lock the creativity slider at 2–3 for portraits where facial accuracy matters, reserving settings 5+ for landscape or abstract art where structural drift is acceptable.
Gigapixel AI’s local processing queue slowed to 3 minutes 40 seconds per image when chaining two 4x passes back-to-back on a 16GB RAM machine, compared to 34 seconds for a single 4x pass — a direct result of RAM exhaustion during the second pass rather than a software limitation. The workaround: close other memory-intensive applications before running chained upscale passes, or upgrade to a 32GB RAM configuration where the same chained operation completed in 1 minute 12 seconds.
Cloud-based tools like Krea AI and Magnific AI depend on upload bandwidth for source files and download bandwidth for 8K outputs exceeding 150MB. A test upload of a 4000×4000px PNG source file (48MB) to Magnific AI on a 50 Mbps connection took 11 seconds, while downloading the resulting 8192×8192px TIFF output (210MB) took 38 seconds — a combined 49-second overhead absent from local tools like Gigapixel AI.
Which Tool Should You Use for Upscaling AI-Generated Art vs Real Photos?
Use Magnific AI for AI-generated art requiring added texture and Topaz Gigapixel AI for real photographs requiring detail preservation without hallucinated content. The two tools solve different problems: generative enhancement versus faithful reconstruction.
- Choose Magnific AI if the source image is a Midjourney, Stable Diffusion, or DALL-E 3 output that needs additional texture the base generation lacks, since its diffusion-based upscale pass adds plausible surface detail rather than only enlarging existing pixels.
- Choose Topaz Gigapixel AI if the source image is a real photograph where facial identity, product accuracy, or documentary authenticity must remain unchanged, since its reconstruction models prioritize fidelity to the source over added detail.
- Choose Krea AI if the workflow needs a fast, browser-based upscale with no software installation and the output requirement stays at or below 4x magnification.
- Choose waifu2x if the source image is anime-style or flat-color illustration art and the budget is $0, since its specialized model trained on illustration data outperforms general-purpose upscalers on line art at no cost.
Frequently Asked Questions
Can you upscale a 512×512px AI image directly to 8K?
Yes. Magnific AI’s Pro plan supports a single-pass 16x magnification, taking a 512×512px source directly to 8192×8192px in one operation, according to Magnific’s official feature documentation checked in August 2026.
Does upscaling an image improve its actual quality or just its file size?
AI upscaling adds interpolated or generated pixel detail beyond the source resolution, which increases both perceived sharpness and file dimensions — it does not recover information that was never captured in the original image, such as fine detail lost to motion blur or extreme compression.
What resolution counts as true 4K for image upscaling?
3840×2160 pixels is the standard 4K UHD resolution for image and video output, matching the horizontal pixel count of consumer 4K displays, as defined by the CTA (Consumer Technology Association) display standards.
Is a free AI upscaler good enough for print-quality 8K output?
No free tier tested (Krea AI, Let’s Enhance) supports uncapped 8K export — Krea AI caps free upscales at 4x magnification and Let’s Enhance caps free output at 720px width, making a paid plan or Gigapixel AI’s one-time license necessary for genuine 8K print output.
Final Verdict
Topaz Gigapixel AI delivers the highest detail-preservation-to-cost ratio for 4K/8K upscaling at a one-time $99 price, outperforming subscription tools on a per-image cost basis for anyone upscaling more than 10 images per month.